Offering your customers the option of paying online helps you avoid the common headaches that come with chasing and receiving payments, and managing your cashflow. You can get paid faster, on the go, automatically and with no fuss. This help note explains how you can easily enable online invoicing to accept credit cards, direct deposits, cheques and more.
Connecting a payment gateway to Saasu
- Login to your Saasu file
- Click the cog in the main menu and select Settings (for this file)
- Select Payments
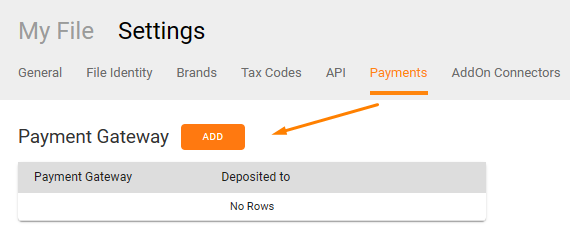
- On the Payment Gateway Screen click Add
- Select your preferred Payment Gateway
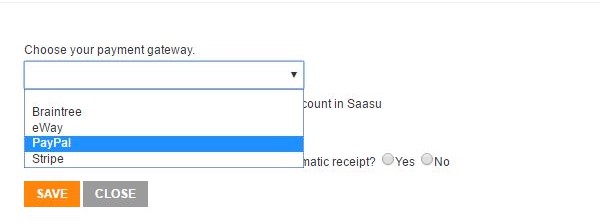
- All four providers require different credentials. Follow these specific instructions for your current provider below and then come back here and complete the final steps.
Enabling your templates (Old Themes and Templates feature only)
Please Note: Saasu files creates after January 2019 use our new Theme Library. This automatically embeds the link for customers to pay their invoice online once the payment gateway is enabled. There is nothing more that needs to be done. The pay online link in the new theme library will appear only in the email sent to your customers, and not the Invoice PDF.
Now that you’ve set up your preferred payment gateway, it’s time to enable online invoicing on your templates, so that a link for online payment gets automatically added to your invoices.
Standard Templates
You can use Online Invoicing on Standard invoice templates that use in-built themes (these are the non-customised templates that come with Saasu). This is how you do this.
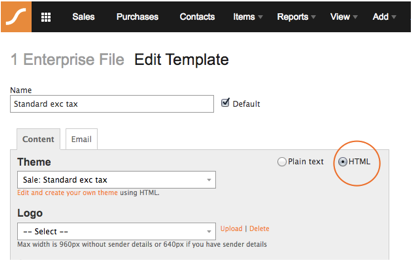
- Go to View and select Templates
- Select one of the standard templates on your list
- Select the HTML option
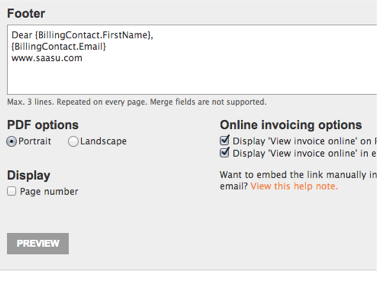
- Scroll down to Online Invoicing Options and tick Display and tick these two options:
- ’View invoice online’ on PDF
- Display ‘View invoice online’ in email
- Click Save
Now your invoice template is ready for online invoicing.
Customising the look of the payment link in your templates
You can customise the look and placement of the payment link in standard templates by using a specific Saasu merge field. There are 2 different merge fields you can place in your template depending on your needs. You can do this in the Content Tab of the Edit Template screen.
This merge field will substitute the “View and Pay this Invoice Online” hyperlink that links to your sale wherever it is located in the template.
{Url.ViewTransactionHyperlink}This merge field will place the entire link wherever it is located in the template.
{Url.ViewTransaction}Using this raw link, you could place a button on your template or simply customise the anchor link to use a specific style and/or text. For example:
<a href={Url.ViewTransaction}>My custom text link</a>Learn more about customising your templates.
Sending out your invoices with online payment link
Now that you’ve enabled online invoicing on your template, you’re ready to start sending out invoices to your customers.
- Go to Sales > Select an unpaid sale > Click Edit
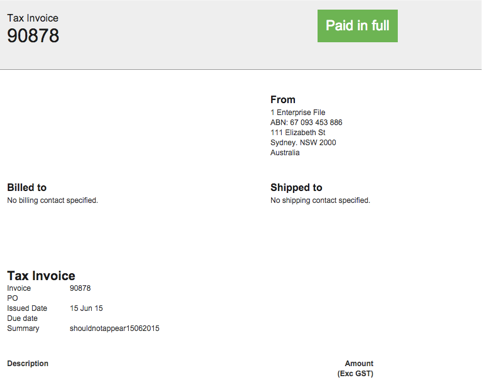
- Select Print PDF > Select Tax Invoice Standard exc tax
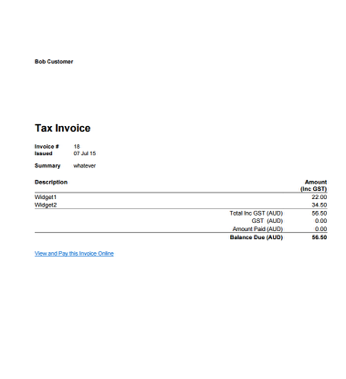
- The Pay Now link will be displayed at the bottom of the invoice
What happens when customers receive your online invoice
Your customers can click the link on your invoice from any device. Once they click the link, they will get taken to this payment window: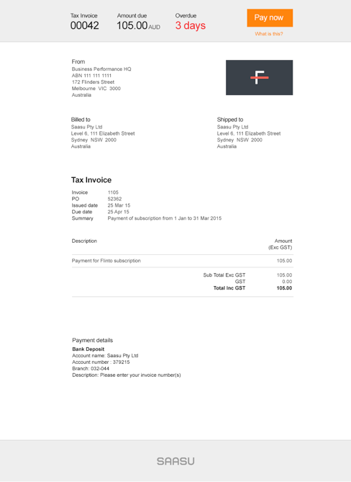
When they click the Pay Now button above, they will be prompted to enter their details.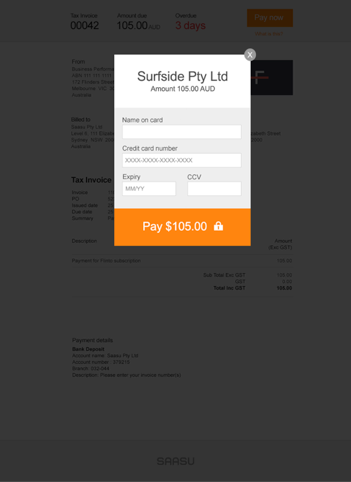
Once the payment is completed, you will receive the message below: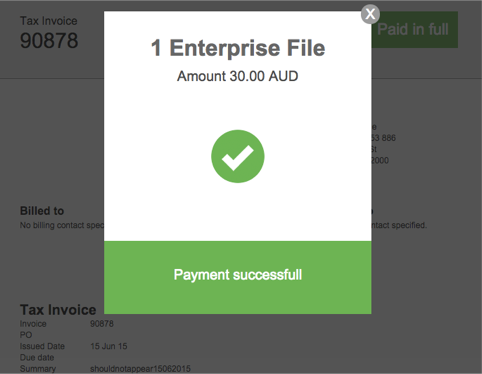
When the payment has been made successfully, the invoice will be marked as paid automatically in Saasu and a receipt will be sent to your customer, without you having to do anything! Simple and easy.
Direct Deposit
You can display Bank Details for Direct Deposits:
- Go to Settings (Cog Icon) and select Payments (for this file).
- From the grey menu select Payments.
- Turn on the option that says Direct Deposit.
- Enter your Account Name, Bank BSB and Account Number.
- Click Save.
Mail Cheque
You can display a mail cheque option:
- Go to Settings (Cog Icon) and select Settings (for this file).
- From the grey menu select File Identity.
- Check that the Street, City/Town, State, Post/ZIP, Country fields are filled in.
- Click save and Close.
- From the grey menu select Payments.
- Turn on the option that says “Mail Cheque”.
- Click Save.
BPay
BPAY is a payment process used in Australia. Businesses wanting to be able to receive BPAY payments will need to contact your financial institution to apply. As part of the sign-up process, you will be provided with a BPAY Biller Code and the BPAY Operations Manual. You can then provide these in your Saasu Invoices so your customers can pay you. Below we provide some ways to help you do this.
How you provide a reference number to your customers is quite important as it may impact reconciliations and other workflow. Generally speaking, unique numbers of each payment help you assign the payment to the correct transaction but require your customer to enter a new unique reference number each time they pay you. Alternately a static number is easy for your customers and reduces their input/entry risk, but it may add to your reconciliation burden. Saasu can only support static CRN’s as we don’t yet support CRN generation. You can create a static CRN for each customer using BPays CRN tools.
You can create a BPay reference number as follows:
- Use the BPay software to work out your clients CRN number. A single digit number. Let’s say 7
- Go to View > Templates. Open your template by clicking on it and navigate to the Payment area.
- Add this text (note that the template can be set to Text or HTML):
Biller Code: [supplied by your bank]
Customer Reference Number: {BillingContact.ContactID}{InvoiceNumber}7
FAQs
Can I add the online invoicing option to my recurring invoices?
Yes, you can. Just follow the exact same steps to add the payment gateway (and enable the online invoicing option on your preferred template if using the Old Themes and Templates feature). Subsequent invoices will be sent with the online invoicing added to it.
Can I add a credit card surcharge to my invoices?
No. You would need to invoice a credit card surcharge as an additional line item on the invoice to someone wanting to pay by credit card if you are charging extra.
My customers credit card expired what do I do?
You can either log into your Stripe account and update their card, or you can uncheck the “Auto billing” option in their recurring sale and save this, then re-check the option. This means the next time they get your recurring sale they will have the option to sign up again with their updated credit card.
What are the advantages of not charging credit card surcharges?
You lose some revenue by not charging surcharges, but there are some very valuable offsets:
- As more revenue is pushed through credit cards, the rate you pay falls. We’ve seen rates ranging from 1-1.5% in small businesses even in the 500k-2m turnover category.
- If prices are adjusted up to cover credit card fees then you remove the click/buy barrier that credit card surcharges are known to have. If half your business is credit cards and you’re on 1.5% fee then you would only have to increase prices by 0.75% to negate it.
- We’ve found credit cards increase payment probability because they are convenient. Direct deposits are more accounting heavy. There’s increased risk of the sale not happening.
- The effect on cashflow from an Accounts Receivable perspective justifies it in our own experience (it may not in other business models).
- Test you view on this from the consumers perspective. What if Apple, MacDonalds or KMart started charging surcharges for using a credit card. Mostly an honest reaction to credit card surcharges is negative nearly all the time.
Can I connect multiple payment gateways?
You can only connect one payment gateway to your online accounting file.